Manually Applying Recommended Zoom Settings
If you prefer to manually apply the recommended zoom settings instead of using the template, you can do so by doing the following below:
Configure these before the session starts. Most are found in the Zoom web application → Settings.
| Setting | Where to find it | Configuration | Recommendation |
|---|---|---|---|
| Waiting room | Account settings → Webinar → Security | Enable | Students queue before being admitted, giving you control over who enters. Instructions on waiting room use whilst in session. |
| Meeting passcode | Account settings → Webinar → Security | Enable | Prevents uninvited participants from joining. Share via Canvas. |
| Authenticated Users only | Settings → Meeting → Security | Enable | Only authenticated staff and students can access the meeting. Assists in identifying any students not present. |
| Mute participants on entry | Account settings → Meeting → Schedule meeting | Enable | All students join muted. Note: Ask students to stay muted unless raising a hand. |
| Participant screen sharing | Account settings → Meeting → In Meeting (Basic) | Disable | Only host needs this capability unless using all screens mode. |
| Recording | Account Settings → Recording → General | Enable as a reference | Ensure you are recording to the cloud. |
| AI Companion | Account Settings → AI Companion → Meeting | Disable | Ensure there is no continued conversation with students after the meeting. |
| - Zoom Apps - Whiteboard - Notes - Docs - Tasks | Account Settings | Disable | Ensure students cannot engage in add-on activities within zoom. |
See further instructions below regarding Enabling Authenticated Users Only, Focus mode and All Screens Mode.
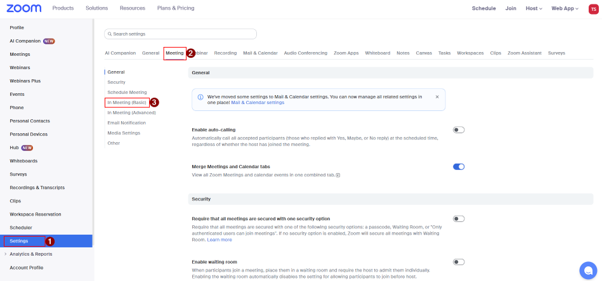
Enabling Authenticated Users Only
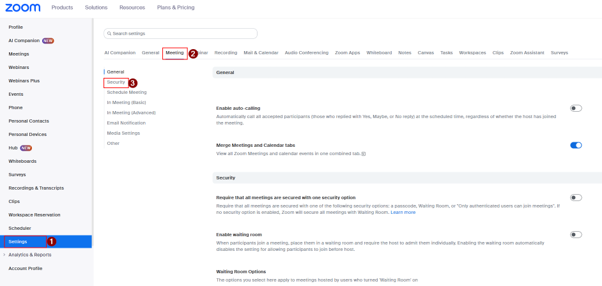
| 1. Click settings, then Meeting, then security. |
 |
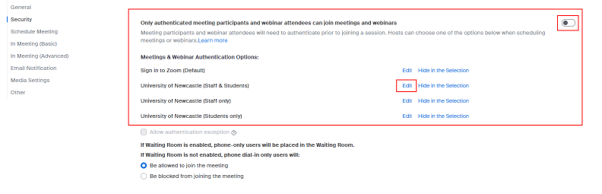
| 2. Scroll down until you find the below, toggle to enable and then click edit. |
 |
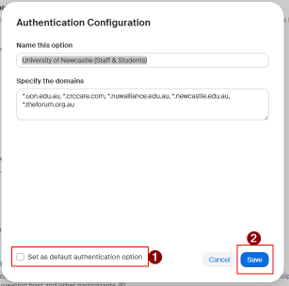
| 3. You can then set the University of Newcastle Staff and Students as your default authentication. |
 |
Enabling Focus Mode BEOFRE the meeting:
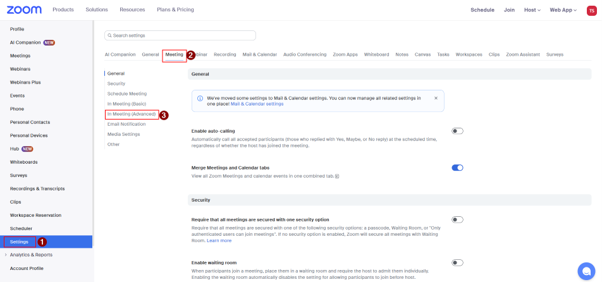
| 1. Click settings, then Meeting, then In Meeting (advanced) |
 |
| 2. Scroll down until you find Focus Mode and then make sure the toggle is switched to enabled (this will show in blue). |
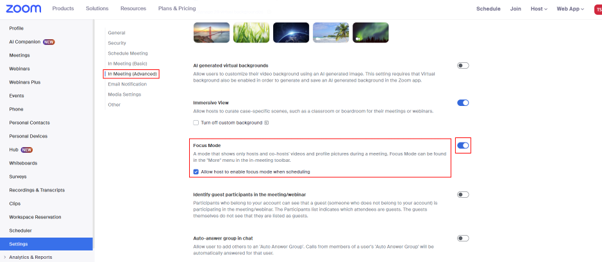 |
Enabling All Screens Mode BEFORE the meeting:
| 1. Click settings, then Meeting, then In Meeting (basic) |
 |
| 2. Scroll down until you find Screen Sharing, make sure the toggle is switched to enabled (this will show in blue). Then click ‘Multiple participants can share simultaneously (dual monitors recommended)’ and then click ‘All Screens Mode’. |
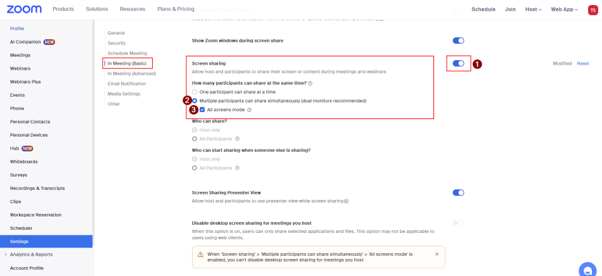 |
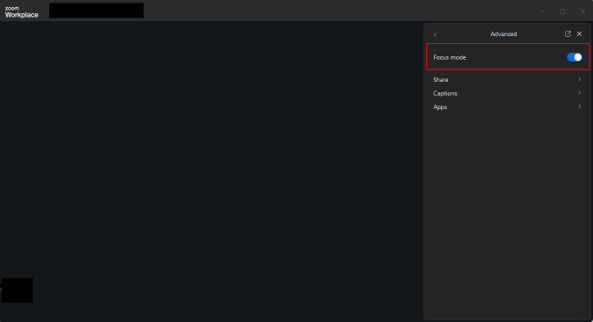
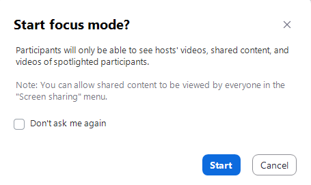
Enabling Focus Mode and All Screens Mode DURING the meeting:
1. In the meeting click on ‘Host Tools’, then ‘Advanced’. |
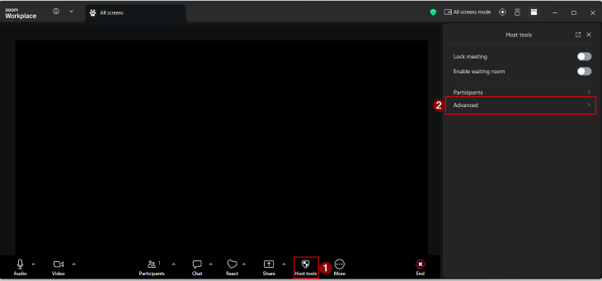 |
2. Enable focus mode and all screens mode by clicking the toggle button (this will show in blue). |
 |
 |
Back to: Recommended Zoom Settings
The University of Newcastle acknowledges the traditional custodians of the lands within our footprint areas: Awabakal, Darkinjung, Biripai, Worimi, Wonnarua, and Eora Nations. We also pay respect to the wisdom of our Elders past and present.