
Your guide to publishing on the University website
Creating a standard page
In Creating your first asset you learned why content areas are important for grouping assets relating to a website you are building, and how you create assets.
With this concept in mind, you can begin to build a website structure below this folder. Once you have created your website structure you can preview the site on the frontend.
About content asset types
There are many content types you can select from in Squiz. The most common asset you use to build websites with is the "standard page". As the name suggests, this asset type specializes in helping you build regular web pages on a website.
In this guide, you’ll learn how to create a standard content webpage.
Create a standard page asset
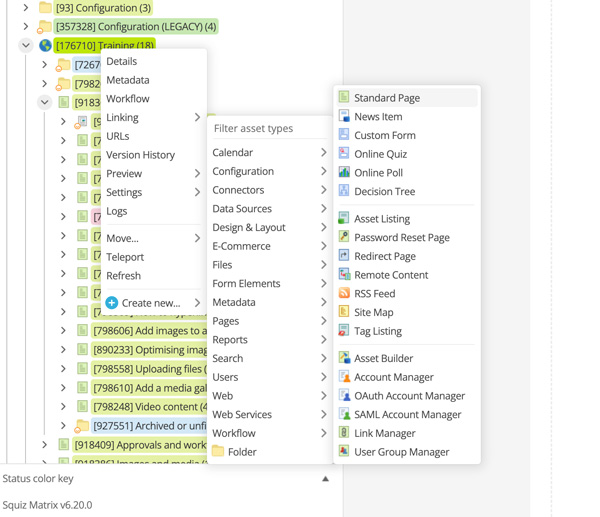
Navigate to the location you would like your new page to sit in the asset tree. Select New child > Pages > Standard page.
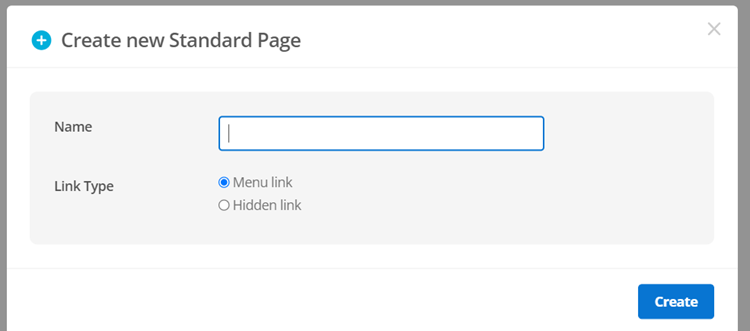
Name the page and set Link type to either Menu or Hidden link. By selecting Menu link, the new page will show up in the side menu on the frontend of the website, hidden link will not.
NOTE: Your page name will also be the page URL. This can be changed on the URLs screen if needed.
Add content to the page
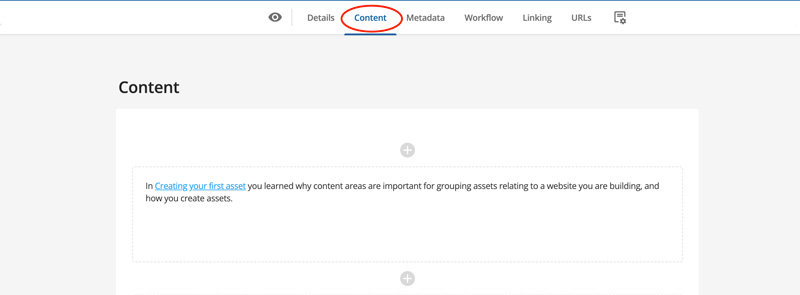
The Content screen of the standard page asset is where you typically create the content that displays on the live site. Add some content to the page, so you have something to display.
1. Switch to the Content screen by right clicking on the standard page and selecting content.
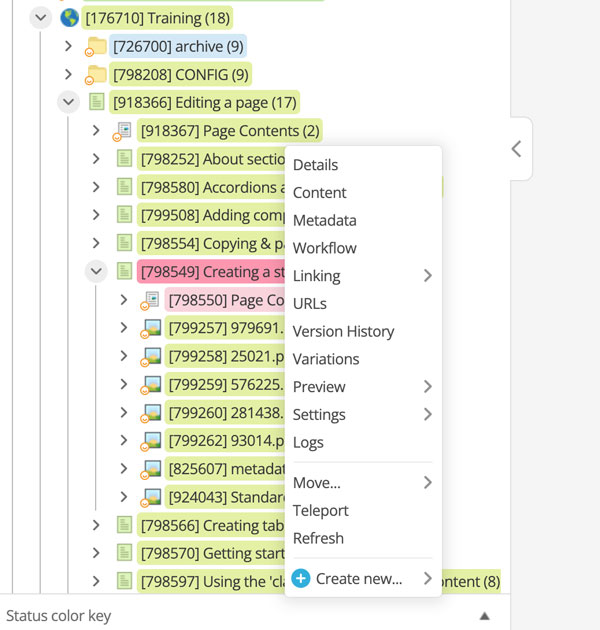
2. Switch to the Content screen by right clicking on the standard page and selecting content.
3. In the content container component type a sentence to display on your page.
NOTE
You can continue making further changes while you hold the page locks. You no longer have the page locks if you see the Edit button display on the screen you are editing.
Next steps
You can view your new page, but it is still unpublished and unavailable to users. To allow users to view your site, you need to publish your site by requesting approval in the workflow process.
To apply for approval, navigate to the details screen. Select ‘Apply for Approval’ in the drop-down menu as shown in the figure below. Make sure to Save this change.

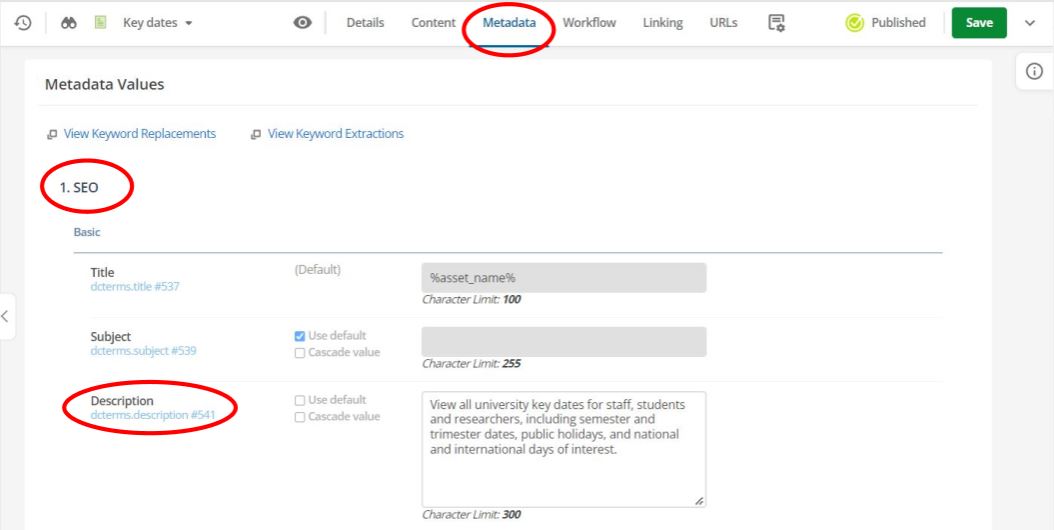
Adding your Metadata Description
A metadata description is a short sentence of text around 160 characters that tells the user what they can do on that page with a call to action.
Add your metadata description by:
- Navigating to the Metadata screen
- Scroll to section 1. SEO here you will find the Metadata Description field. Keep your description to 160 words or less. It will get cut off otherwise.
Preview the results
There are a few different ways to preview your new page
- Click the Preview button which is shaped like an eye found to the left of the details button.
- Right-click on the asset in the asset tree and select "Preview" > "In new window"
- Click Save.
You can now begin adding content to the page.
The University of Newcastle acknowledges the traditional custodians of the lands within our footprint areas: Awabakal, Darkinjung, Biripai, Worimi, Wonnarua, and Eora Nations. We also pay respect to the wisdom of our Elders past and present.